
❈ ❈ ❈ ❈ ❈ ❈ ❈ ❈ ❈ ❈

Thanks for visiting my page! Here is a written tutorial with photos on How To Make The Invisible Finish!
First, with any project you’ll need a crochet hook and yarn. Any yarn or hook will do for learning this stitch.

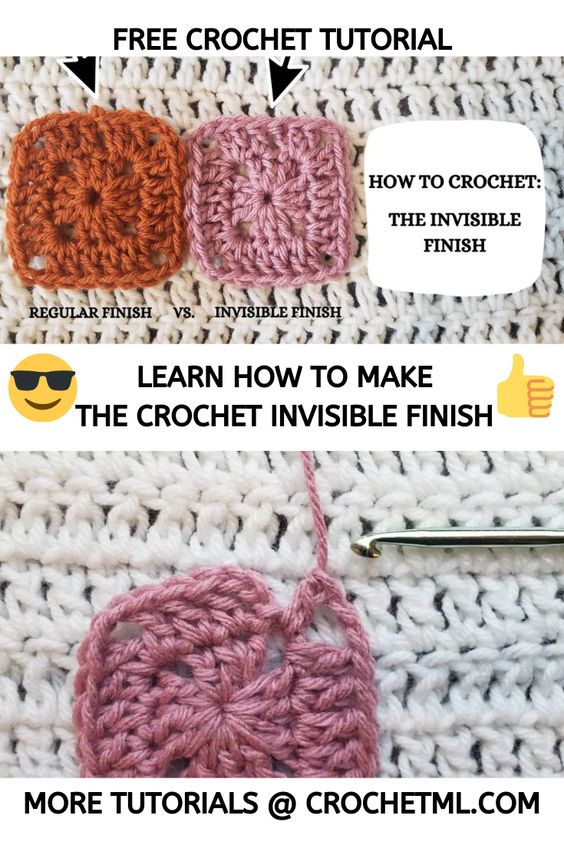
In the example square above I have made it to the end of my row where I could need to Fasten Off or Finish Off.

So to begin the Invisible Finish you pull the loose yarn you were working with through the final stitch you just made.

You'll then insert your hook into the top of the first stitch made in that row, grab the loose yarn or yarn end and pull it through that stitch.

This is what you should have so far!

You'll then grab through the back loop (from the back of your work) and grab the loose yarn or yarn end. Then pull that yarn through the stitch (this should be the last stitch you made in this row).

Then you will take that loose yarn or yarn end and weave it into the back of your work.


This is what the Invisible Finish should look like when completed!
❈ ❈ ❈ ❈ ❈ ❈ ❈ ❈ ❈ ❈
❈ ❈ ❈ ❈ ❈ ❈ ❈ ❈ ❈ ❈
❈ ❈ ❈ ❈ ❈ ❈ ❈ ❈ ❈ ❈
Check out this playlist featuring more beginner tutorials here!
Here are some more crochet techniques to check out:
Crochet Beginner Guide: What Tools To Buy, tutorial here!
How To Change Colors, tutorial here!
The Magic Loop (Magic Ring, Magic Circle), tutorial here!
You can find video tutorials from me here!
More crochet patterns from me here!
& photo tutorials from me here! 💗
You can follow me on all social media @crochetmelovely!
Also, like & subscribe to my Youtube Channel to see more videos from me!
Don't forget to sign up for the CML email list to get notifications whenever I upload new content! Located at the very bottom of my home page!
❈ ❈ ❈ ❈ ❈ ❈ ❈ ❈ ❈ ❈