![](https://cdn.shopify.com/s/files/1/0620/7180/0037/files/Scattered-Light-Granny-SQ-1024x576.png)
![](https://cdn.shopify.com/s/files/1/0620/7180/0037/files/Untitled-design-1024x576_2022-07.png)
Row 1: Make 5 CHs
![](https://cdn.shopify.com/s/files/1/0620/7180/0037/files/Untitled-design-1-1024x576_2022-07.png)
Make 1 DC into the 4th CH from your hook or farthest CH from your hook
![](https://cdn.shopify.com/s/files/1/0620/7180/0037/files/Untitled-design-2-1024x576_2022-07.png)
*Make 3 CHs
![](https://cdn.shopify.com/s/files/1/0620/7180/0037/files/Untitled-design-3-1024x576_2022-07.png)
Make 1 DC V into that same center CH/circle
![](https://cdn.shopify.com/s/files/1/0620/7180/0037/files/Untitled-design-4-1024x576_2022-07.png)
Repeat the steps above from * until you have 4 DC Vs for the sides and 4 corner spaces from CH 3s
![](https://cdn.shopify.com/s/files/1/0620/7180/0037/files/Untitled-design-5-1024x576_2022-07.png)
SL ST into the 1st CHs you made in this row to complete Row 1
![](https://cdn.shopify.com/s/files/1/0620/7180/0037/files/Untitled-design-6-1024x576_2022-07.png)
Row 2: Flip your SQ over, start at a corner space, make 4 CHs
![](https://cdn.shopify.com/s/files/1/0620/7180/0037/files/Untitled-design-7-1024x576_2022-07.png)
Make 1 DC into that same corner space
![](https://cdn.shopify.com/s/files/1/0620/7180/0037/files/Untitled-design-8-1024x576_2022-07.png)
Make 3 CHs
![](https://cdn.shopify.com/s/files/1/0620/7180/0037/files/Untitled-design-9-1024x576_2022-07.png)
Make 1 DC V into that same corner space
![](https://cdn.shopify.com/s/files/1/0620/7180/0037/files/Untitled-design-10-1024x576_2022-07.png)
*Make 1 DC V into the previous side DC V
![](https://cdn.shopify.com/s/files/1/0620/7180/0037/files/Untitled-design-11-1024x576_2022-07.png)
DC V, CH 3, DC V into next corner space
![](https://cdn.shopify.com/s/files/1/0620/7180/0037/files/Untitled-design-12-1024x576_2022-07.png)
Repeat the steps above from * around
![](https://cdn.shopify.com/s/files/1/0620/7180/0037/files/Untitled-design-13-1024x576_2022-07.png)
SL ST into the 1st CHs you made in this row to complete Row 2
![](https://cdn.shopify.com/s/files/1/0620/7180/0037/files/Untitled-design-14-1024x576_2022-07.png)
Row 3: Flip your SQ over, start at a corner space, make 4 CHs
![](https://cdn.shopify.com/s/files/1/0620/7180/0037/files/Untitled-design-15-1024x576_2022-07.png)
Make 1 DC into that same corner space, make 3 CHs, make 1 DC V into that same corner space, the corner spaces will stay the same throughout your project
![](https://cdn.shopify.com/s/files/1/0620/7180/0037/files/Untitled-design-16-1024x576_2022-07.png)
*Making more DC V STs into previous ones make more for your next row, so now for Row 3 we have 3 DC Vs along our side, work 1 DC V into each one across to the next corner space
So as your side gets bigger, you can see you'll have more DC Vs to work into for any future rows
![](https://cdn.shopify.com/s/files/1/0620/7180/0037/files/Untitled-design-17-1024x576_2022-07.png)
So same corner, DC V, CH 3, DC V into that next corner space
![](https://cdn.shopify.com/s/files/1/0620/7180/0037/files/Untitled-design-18-1024x576_2022-07.png)
Repeat the steps above from * around
![](https://cdn.shopify.com/s/files/1/0620/7180/0037/files/Untitled-design-19-1024x576_2022-07.png)
SL ST into the 1st CHs you made in this row to complete Row 3
Repeat Row 3 for however big you want your SQ
![](https://cdn.shopify.com/s/files/1/0620/7180/0037/files/Untitled-design-20-1024x576_2022-07.png)
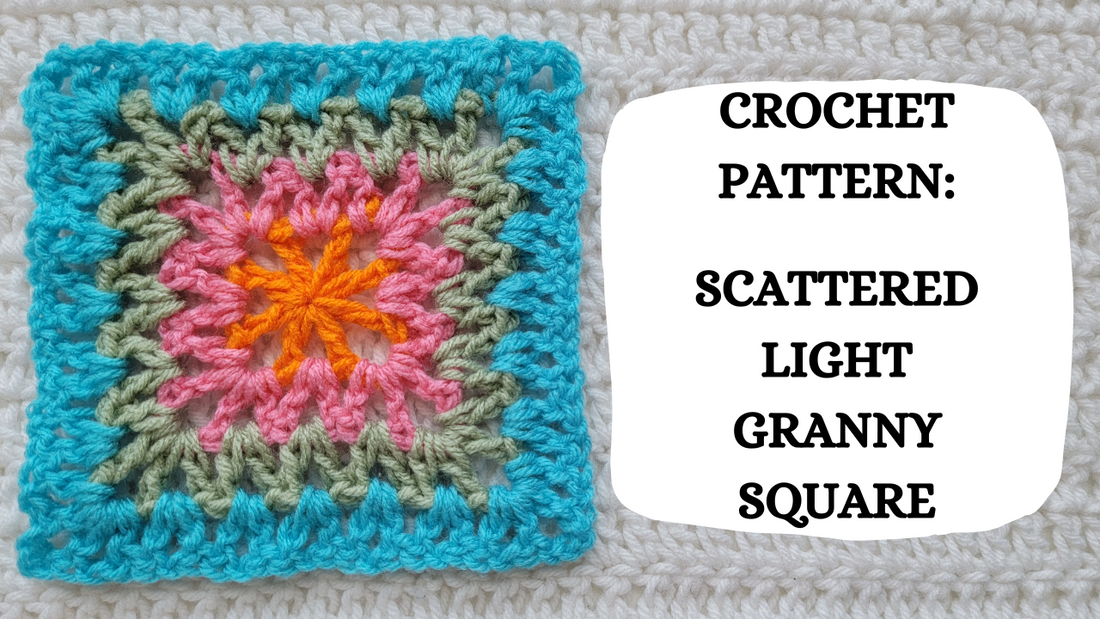
This is what the Scattered Light Granny Square looks like when completed!
❈ ❈ ❈ ❈ ❈ ❈ ❈ ❈ ❈ ❈
❈ ❈ ❈ ❈ ❈ ❈ ❈ ❈ ❈ ❈
The Trellis Stitch, tutorial here!
The Crossover Stitch, tutorial here!
Half Double Crochet Cluster Stitch, tutorial here!