
For this tutorial you'll need to know how to make Chains (CH), I have a tutorial here! How to make the Double Crochet Stitch (DC), tutorial here! How to make the Front Post Double Crochet Stitch (FPDC), tutorial here! And how to make the Back Post Double Crochet Stitch (BPDC), tutorial here!
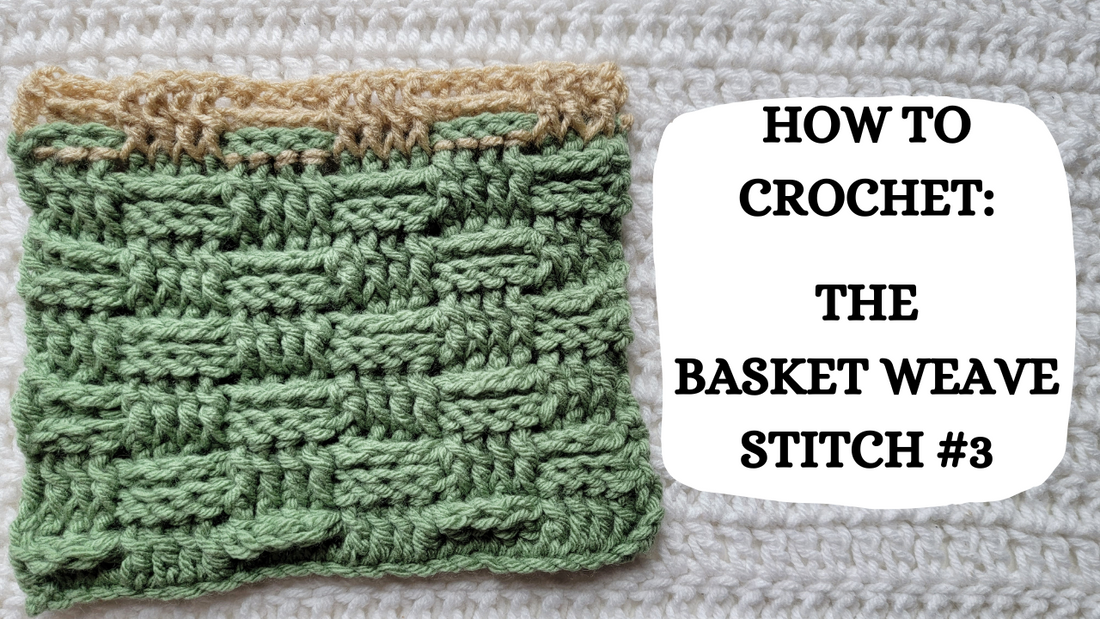
Starting from the beginning make CHs in the multiple of 8 + 3 or 6 + 3
I am using 6 + 3 for my tutorial
❈ ❈ ❈ ❈ ❈ ❈ ❈ ❈ ❈ ❈

Row 1: Make 1 DC into the 3rd CH from your hook


Make 1 DC into each CH across
Row 1 is your Foundation Row of all DC

Row 2: Make 2 CHs

Skip the 1st ST, make 1 FPDC into each of the next 3 STs

Make 1 BPDC into each of the next 4 STs

*Make 1 FPDC into each of the next 4 STs

Make 1 BPDC into each of the next 4 STs

Repeat the steps above from * until you have 1 ST left in your row


Make 1 DC into the last ST of your row
Row 2 is establishing your 1st FPDC & BPDC STs

Row 3: Make 2 CHs

Make 1 BPDC into each of the next 4 STs

Make 1 FPDC into each of the next 4 STs
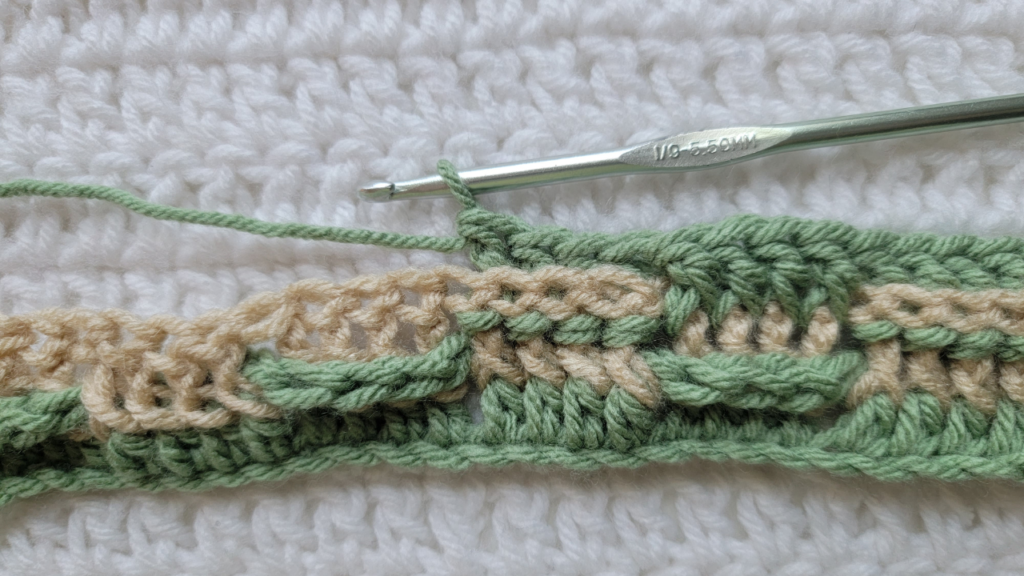
Make 1 BPDC into each of the next 4 STs
Make 1 FPDC into each of the next 4 STs


Repeat the steps above from * until you only have turning CHs left, into the top of the previous turning CHs make 1 DC
Row 3 is your matching row, you will be matching whatever STs you made in Row 2 or the Row below this one

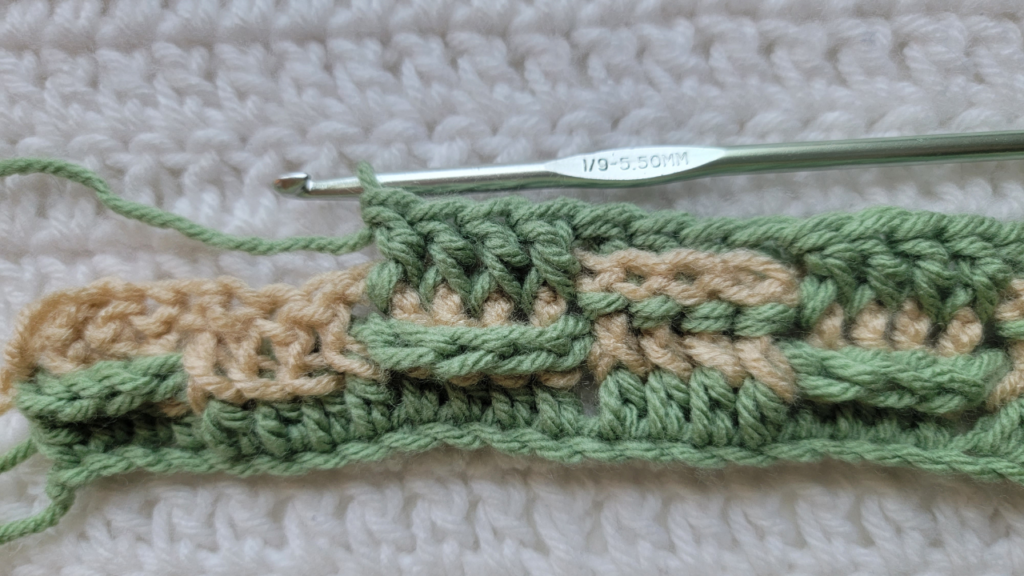
Row 4: Make 2 CHs

Make 1 BPDC into each of the next 4 STs

*Make 1 FPDC into each of the next 4 STs

Make 1 BPDC into each of the next 4 STs


Repeat the steps above from * until you only have turning CHs left, into the top of the previous turning CHs make 1 DC
Row 4 is your opposite row, you'll make the opposite FPDC & BPDC from Row 3 or the row before this one
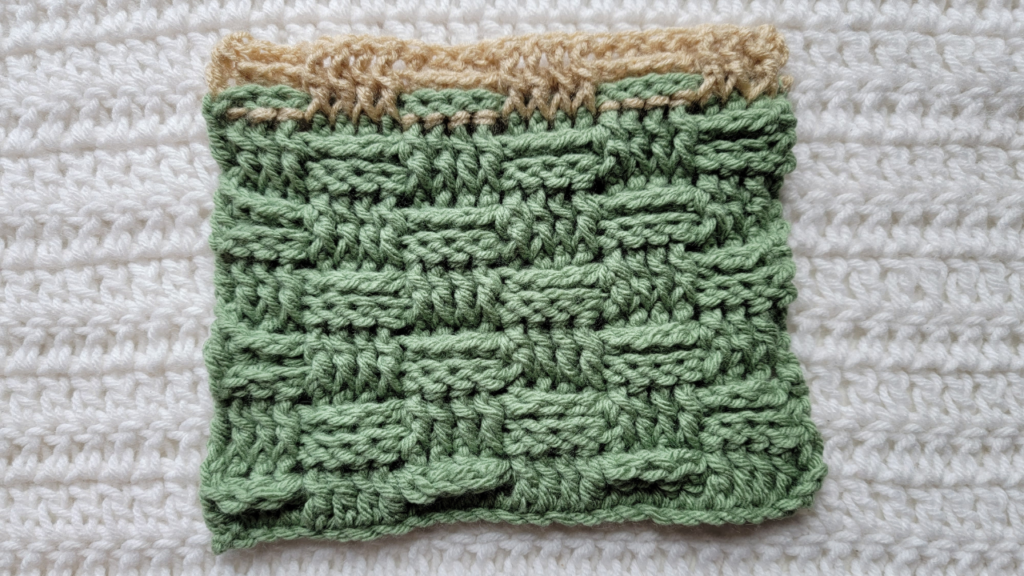
Alternate between Rows 3 and 4 for however long you want your project
So from here with this tutorial you'll be making 2 rows of the same STs then 2 rows of the opposite STs
❈ ❈ ❈ ❈ ❈ ❈ ❈ ❈ ❈ ❈

❈ ❈ ❈ ❈ ❈ ❈ ❈ ❈ ❈ ❈
Check out this playlist featuring more Basket Weave Stitches here!
The Avalon Stitch, tutorial here!
The Celestial Stitch, tutorial here!
Half Double Crochet Cluster Stitch, tutorial here!