❈ ❈ ❈ ❈ ❈ ❈ ❈ ❈ ❈ ❈
Thanks for visiting my page! Here is a written tutorial with photos on how to make the Invisible Knot!

For this tutorial all you will need is some yarn to join together

Bring in yarn #1, point the end towards the left

Take that end and bring it under the body of yarn #1, creating a loop
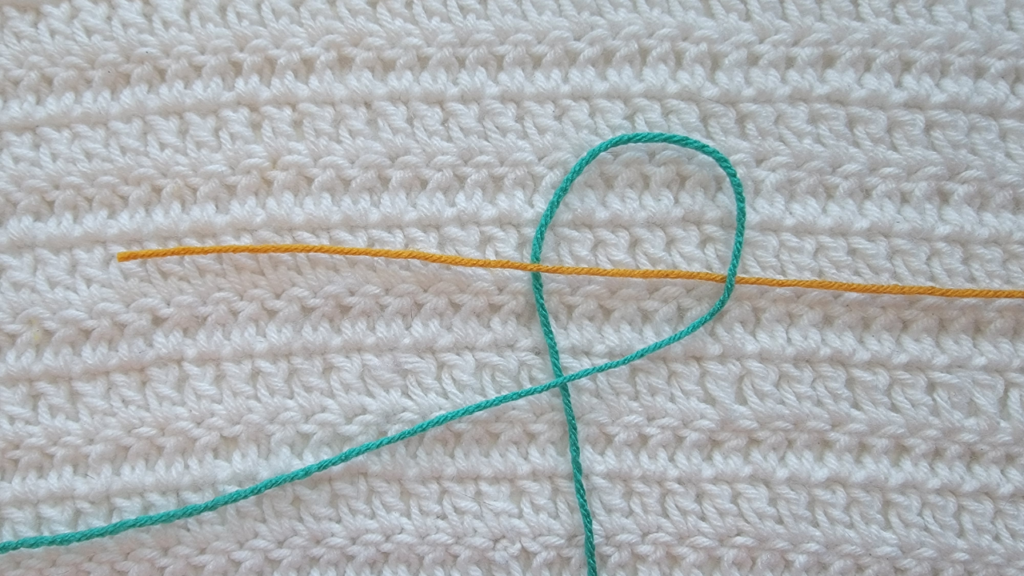
Bring in yarn #2, take that yarn through the loop of yarn #1, from right to left

Then take the end of yarn #2 down over the body of yarn #1

Then take the end of yarn #2 under the end of yarn #1

Keep going with the end of #2, take that up through the loop of yarn #1

Grab the body and ends of both yarns

Slowly pull away from the middle, creating a knot


This is where you would pull tighter, to make the knot tighter. Then cut the yarn ends

This is what the Invisible Knot should look like when completed!
❈ ❈ ❈ ❈ ❈ ❈ ❈ ❈ ❈ ❈
❈ ❈ ❈ ❈ ❈ ❈ ❈ ❈ ❈ ❈

❈ ❈ ❈ ❈ ❈ ❈ ❈ ❈ ❈ ❈
Check out this playlist featuring more Yarn Joining techniques here!
Here are some more crochet techniques to check out:
Slip Stitch Back Loop Join, tutorial here!
How To Crochet In The Front Loops, tutorial here!
How To Use Stitch Markers, tutorial here!
You can find video tutorials from me here!
More crochet patterns from me here!
& photo tutorials from me here! 💗
You can follow me on all social media @crochetmelovely!
Also, like & subscribe to my Youtube Channel to see more videos from me!
Don’t forget to sign up for the CML email list to get notifications whenever I upload new content! Located at the very bottom of my home page!
❈ ❈ ❈ ❈ ❈ ❈ ❈ ❈ ❈ ❈